Thursday, September 19, 2013

New Traditionalists

Today was the first meeting of our new U3A group, which is for knitters who like to knit "in the old way", although as it turns out we are all very much up to date!

Janette, May, June and Jennie all came to my house where we ate apple cake and Dutch ginger cake.  Janette knitted quite a bit, June knitted a bit, I knitted hardly at all and kept losing my place because the conversation was so interesting.  So much so that I forgot to take any photographs to record the event!

So here is cake:

and here my rams and yowes blanket which was much admired - thank you ladies.  Below are old photographs of it showing the steek before cutting and being sewn down on the machine.


Today I demonstrated how to make a centre-pull ball using a porridge spurtle as a nostepinne, and how you could use that ball knit with two strands without tangling.  Here is an acrylic spoon being used in the same way:


May was wearing a gorgeous cardigan which she had adapted for herself: beautiful cotton yarn with garter stitch and cables which looked incredibly comfy.

Jennie brought along her experiences in Iceland and the Faeroes, with a really fabulous book of Faeroese pattern charts.

June was knitting socks but explained to us how to thread beads to achieve the gorgeous examples of beaded knitting she had completed.

Janette was inspired to begin knitting a Fair Isle tam in 4 colours.

We have all knitted for years, have lots of techniques in common and all have lots of experience and ideas to share over the coming meetings.  Already I am looking forward to October 3rd when we meet again.  If any of us go to Yarndale the weekend after next then there should be some good "yarns" over our next pot of tea.  (Ouch!)


Monday, May 6, 2013

Dernhelm: a battle corselet for Eowyn

THE BATTLE OF THE PELENNOR FIELDS

Then Merry heard of all sounds in that hour the strangest.  It seemed that Dernhelm laughed, and the clear voice was like the ring of steel.  "But no living man am I!  You look upon a woman.  Eowyn I am, Eomund's daughter.  You stand between me and my lord and kin.  Begone, if you be not deathless!  For living or dark undead, I will smite you, if you touch him."          J.R.R. Tolkien


Dernhelm is a straightforward pullover/vest with shaping achieved through ribbing and travelling stitches.  It should fit fairly closely as it is designed to flatter feminine contours.  Knitted here in a firm 100% wool yarn, the close texture gives a reassuring strength to the fabric. 

As this is my first attempt at pattern-writing, I hope it will be easy to follow: as yet there has been no test-knitting other than my own attempt.  Please let me know if you spot any problems or would like to test knit!


To fit: 
Bust size 36" [ 92cm ].  Length of body adjustable.
Materials:
3 x 100 g balls of Cushendale Double Knit, shown in Jade
Circular needles - 3mm x 100cm (or 80cm) , 3.75 mm  x 100 cm (or 80cm) for body, 3mm x 40 or 60cm for sleeves and neck opening  [Dpns could also be used if preferred]
Cable needle
Stitch holders or spare yarn
Gauge:
24st and 36 rounds to 4" in st st on 3mm needles (unblocked swatch)
Abbreviations:
k - knit
p - purl
st st - stocking stitch ( all rows knit in round or k1 row, p1row in flat kniting)
ktbl - knit through back of loop (knit in back; twisted knit stitch)
twisted rib - *k2tbl, p2 *, repeat
NB all knit stitches in ribs and pattern panel are twisted stitches (knit through back of loop)
tl - travel left  - place next stitch on cable needle and hold at front of work, purl next stitch from left needle, ktbl stitch from cable needle (2 sts worked)
tr - travel right  - place next stitch on cable needle and hold at back of work, ktbl next stitch from left needle, purl stitch from cable needle (2sts worked)
M1 - increase 1 st (k in front and back of stitch or pick up and knit 1 loop between stitches
K2tog -  right-leaning decrease by knitting 2 stitches together
Skp - left-leaning decrease by slipping 1st, knitting the next and then passing slip stitch over [or ssk if preferred].

Cast on:  Using 3mm x 100/80cm needle, cast on 204 stitches using an elastic method, e.g. long-tailed cast-on, place a marker and close for working in the round.  Work in twisted rib as follows
 - k1tbl, *p2, k2tbl* ,repeat to end of round, k1tbl. 
Continue rib for 1.25" [ 3cm ] or required depth.

Change to 3.75 x 100/80cm needle and continue in st st until work measures 7" [18cm] or required depth to begin waist-shaping (about 1.25" or 3cm below natural waistline). On final round place a marker after 102 stitches (half-way mark).

 Return to smaller gauge needle and work in twisted rib as given at start.  Continue in rib for
 9 rounds.  ( Tweak!  See additional note at end of pattern.)
Next round: Travelling round A - *tl, tr* repeat to end of round.  
Keeping rib correct work 6 rounds.
Next round: Travelling round B - *tr, tl* repeat to end of round.
Keeping rib correct work 6 more rounds.

From here on, work only in twisted rib between the markers for the back (see picture on left). 


 Between front markers, (see picture on right) continue travelling pattern as follows:
Next round: Travelling round A between front markers (rib only at back)
Keeping rib correct work 6 more rounds.
Next round: Pattern continues only on central 36 sts.  Work as follows across front - rib 33sts, work travelling round B for next 36 sts, rib 33 sts, slip marker, rib across all back stitches.

Keeping rib correct work 3 rounds.
Next round: Rib 33sts, work travelling round A for next 36 sts, rib 33 sts, slip marker, rib across all back stitches.

Keeping rib correct work 3 more rounds.
Next round: Pattern continues only on central 32 stitches.  Work as follows across front - rib 35 sts, work travelling round B for next 32 sts, rib 35sts, slip marker, rib across all back stitches. Pattern on back is now complete.


Change to larger gauge needle to continue body.
 Next round: k36, keep rib correct over next 30 sts, k 36 to marker, k across back. 
Repeat this row twice more.

From here only central stitches will be included in the pattern to create triangular shaping (see picture above).  Alternate travelling rows A and B with 3 rows straight ribbing in between each to achieve "honeycomb". Each time decrease the central panel by 4 stitches (2 extra k sts on each side of it) until you are working over just 4 stitches. End on a travelling row, working across the front and stop 5 stitches short of the marker (which marks the right underarm point).
 In the model shown this brought the pattern exactly to the point of the v-neck, but if you wish to extend the body length (waist to underarm) you will need to continue working the pattern over these last four stitches to the desired length, ending on a travelling row, and stopping 5 stitches before the right underarm marker.

Divide for armholes:  Place 5 right front underarm stitches,  all of the back stitches and 5 further stitches after the marker for the left front underarm on a large stitch holder or spare circular needle  (112 sts).  Continue with front of garment (92sts).

Left front: worked flat.
Row 1:  K2tog, k44.  Slip remaining unknit stitches onto a holder for right front.  Turn.
Row 2: P to last 2st, P2tog.
Row 3: K2 tog, k to last 2 st, skp.
Row 4: P to last 2 st, P2tog
Continue in st st, decreasing 1 st at each end of next and every following alternate row until 33 st remain.
 Keep armhole edge straight and decrease 1 st at neck edge on every following alternate row until 19 st remain.
Knit straight for 20 rows (or until desired length to shoulder) then place stitches on holder.

Right front: worked flat.  With right side facing rejoin yarn at inside neck edge.
Row 1: K to last 2 st, skp.
Row 2: P2tog, p to end
Complete shaping to match left side and place remaining stitches on holder.

Back:  Reserve 10 sts on either side of the back on holders or yarn to create underarm.  Rejoin yarn to central 92 sts.  Working flat and in st st, with right side facing rejoin yarn.   Decrease 1 st at each end of the next 5 rows, then every following alternate row (k rows) until 76 st remain.  Work 37 rows straight (or to match length to shoulder).
For back neck, with right side facing, k21, turn.
Dec 1 st at neck edge on next 2 rows.  Purl 1 row and keep 19sts on needle or a holder for right shoulder. 
Place centre 34 sts onto a holder.
With right side facing rejoin yarn to inside neck edge of remaining 21 st, k to end.  Complete to match opposite shoulder.

Join shoulder stitches:  Use a 3-needle bind-off to join the 19 stitches of each shoulder, working with wrong sides facing you.

Neckband:  With right side facing and 3mm x 60cm needle, rejoin yarn and pick up 50 st on right side of neck (approx.  1 st per row, so may need more or less if length adjusted) and 3 at back neck decrease, knit across 34 centre back sts, pick up 3 plus 50 st down left side of neck.  Join.  You will be working the twisted rib pattern as before but need to position the ribs carefully - see close-up photograph of front.  The central 2 stitches of the v-neck continue in twisted rib.  Decreases for the neck are worked on either side of these 2 stitches on every row.  Count your stitches carefully and line everything up before you begin.  (Your total number may need to be adjusted to fit - if so, add in stitches evenly along the slanted neck edges so that you do not over-tighten the neckline.)  Work 1" [2.5cm] in rib, decreasing by 2 st in each round, one on either side of 2 central stitches, or required depth and then cast off [bind off] loosely in rib, or use a suspended bind off to maintain an elastic edge.

Armhole edgings: With right side facing and 3mm x 40/60cm needle, return to underarm stitches.  Place the 5 left-hand stitches on your new needle and rejoin yarn to k across them, pick up and k 12 stitches from decrease edge (1 per row), a further 68 st from straight edge, up front, over shoulder and down back (about 5 for every 6 rows), 12 more from shaped edge and then knit across the remaining 5 st from holder.  Total of 102 st.  NB:  if you have lengthened the pattern you will need more or fewer sts from straight section to accommodate.  Join in round and work 1" [2.5 cm] twisted rib, or required depth, and cast off [bind off] as for neckband. 
Repeat for 2nd armhole edge.

Darn in yarn ends.  Block or steam lightly, taking care not to flatten ribbing and pattern sections.

Let your hair down and wear it proudly, Shield-Maiden!

(Tweak!  Close up view of the front panel shows that in within the first 9 rounds of rib, I "travelled" the 4 central stitches only at rows 3 and 6.  You may choose to do this if you wish, or add in any other variation to make Dernhelm unique. )


Friday, June 1, 2012

Miss Blossom's First Outing

For a while Miss Blossom lived in the kitchen with us, and she is still awaiting refurbishment of her permanent home.  She is extremely patient, especially as I have had fewer conversations with her than I had intended.  So far anyway.

However, her first outing was a lovely one.  I took a beautiful swatch of vintage liberty fabric and turned it into a movie star blouse with Miss Blossom's help and inspiration from Burdastyle magazine.  

Here she is looking very glamorous...


and the back view....

and an alternative way of wearing the garment.


You lucky girl, Mary!        

Thursday, March 8, 2012

Colours of springtime


My friend Louisa called around today and brought these beautiful tulips for me.  

The colours are so vibrant and uplifting.  I really should make something in this palette!


Thank you, Louisa.  xx

Wednesday, March 7, 2012

Frothy thoughts - Lace knitting from the start

As well as a Fair Isle fascination, I've been trying my hand at lace knitting.

There have been a few attempts at lacy items in the past, such as a Zimmerman Pi Shawl :
 which I gave to my niece as a baby present.  It doesn't look too dreadful here, but there are a fair few mistakes in it to be truthful and it made me vow not to knit with fluffy fluffy kid-silk haze for such intricate projects in the future. Although, actually, now I know this is not all that intricate - rather a matter of counting.

A few flings with Noro also confirmed my deep hatred of that particular yarn, but two shawls later:

Noro
Holden Shawlette knitted in sock wool
 I decided not to fiddle about on the edges but to get a proper lace project on the go.

Hence The St Ninian's Scarf , knitted in 1-ply Shetland Lace (practically cobwebs!) and designed by Mary Kay for Jamieson and Smith of Lerwick.  Here it is at an early stage - a point at which Tom asked what on earth it was meant to be.  Well, perceptions differ.  He thought it was a bit of scrat whilst I thought it looked lovely and frothy at this point.  True, you can't really see how the lace will turn out at this stage, but already I was learning a few things.  
1)  Persistence.  What you see is 4th attempt to get that far.  4th!  Ripping back and starting right from the beginning again!   Drop a stitch or make it badly, miss your counting, speak to someone, look up briefly, sneeze --- any of those things and you have really lost it with this kind of lace.  The mistake just runs and runs, right to the bottom, bringing up whacking great holes that you can never fathom how to fix.  I can take back and fix mistakes, do serious knitting surgery for others on all sorts of projects, but lace?  Nope, it has a life of its own.  So to get this far involved a lot of bitten bullets and blue air.  However, things got better when I learned about...

2) Lifelines.  Look carefully at the image above and you will spot a thread of red near to the knitting needles (improvised dpns with beads temporarily stuck on).  This is a very aptly named lifeline.  At certain points in the knitting, say every 10 rows or at the end of a pattern repeat, the canny lace knitter takes a sewing-needleful of contrast thread and takes it through every stitch on the knitting pin.  And there it rests.  If now, by chance, a stitch or three go astray they will only run down as far as the lifeline where they can be retrieved.  And even if that means completely ripping back 9 rows (or more) to that lifeline, it is a darned sight easier than starting over for the fifth time, believe me. 

A few points on lifelines - 
  •  contrast thread can be anything.  Some people use dental floss which is actually brilliant.  I tried it but went to red thread because I couldn't see the difference between floss and the yarn so well, and you need to see it because,
  • when you knit your next row you need to be careful to knit the stitches cleanly without taking up the lifeline at all.  You don't want it knitted into your lace, because later you need to remove it, whether at the end of the work, or more bravely after the next 10 rows or so to re-introduce it in a new position. 
  • Also, if you are using a stitch marker to identify a border or pattern repeat, do not thread the lifeline through it.  If you do it will stay with the lifeline rather than move up through the rows as you knit, therefore defeating its purpose.
Now the St Ninian's Scarf is a small lace project, a scarf measuring just 9" by 41" with reasonably simple stitch patterns, so it is excellent for a beginner such as my self to cut their teeth on and learn the techniques.  The pattern is charted and uses the following 'takes' or decreases ...
k2tog
ssk
s1 k2tog psso.  The first two of which can get very confusing indeed on a chart as they are the mere difference between / and \.  So a bear of little brain like myself found out that beginners can take...

3) Shortcuts.  Until you have learned how lace behaves it is absolutely ok to do all the single decreases as k2tog (or ssk if that is your preference) without seriously affecting the pattern.  Now I know that purists and expert lace knitters will throw their aprons over  their heads at this suggestion, but remember that we are still learning.  It is my firm belief that a first project means getting the hang of how things behave.  Save refinement and technical expertise for later.
Likewise s1 k2tog psso can be substituted.  This operation always makes for a rather baggy over stitch, which is eliminated (and easier to perform) as k3tog.

4) Dressing.  Over the last few years I have become ardently converted to blocking knitting rather than just  wearing it as soon as it comes off the needles.  In lacework, blocking is known as dressing, and experienced Shetland lace knitters have all kinds of boards and wires and contraptions for achieving the finish on their (breathtakingly beautiful) knitted items.  But for less expense at home I did this:

Take finished knitting (scratty-looking or otherwise) and fold cast-on edges together (both cast-ons due to construction of this piece).
Sew sides together into a tubey-baggy sort of affair using cotton thread.

Wash gently and carefully and take most of water out by rolling in dry towels.


Stretch over a piece of cardboard 20% wider and longer than finished measurements.  Join the scallop points of the short edging by sewing them together.

Leave the whole lot to dry.

(You may notice the ends are still visible.  Although woven in, it is best not to cut them off until after the scarf is dressed.)

Once dry, carefully (and I mean carefully!) snip away the cotton stitching to remove scarf from dressing board.


Voila! 


And on to the next lace project ..., although my imagination has been caught by knitting two socks at the same time, one inside the other, and Tom would like a hat, and one day his fine scarf  and,....

Monday, February 13, 2012

Half term - Monday

This is what we made today:


Dan Lepard's "One-a-day cookies" from his book Short and Sweet.  We think it is impossible to eat only one of these, so ours are called 2-a-day cookies (although we get twice as many cookies from his recipe mix as he claims it will make, so that's fair).  And:


a little heart (pin)cushion, made by Mary using new sewing machine and hand stitches.  And:


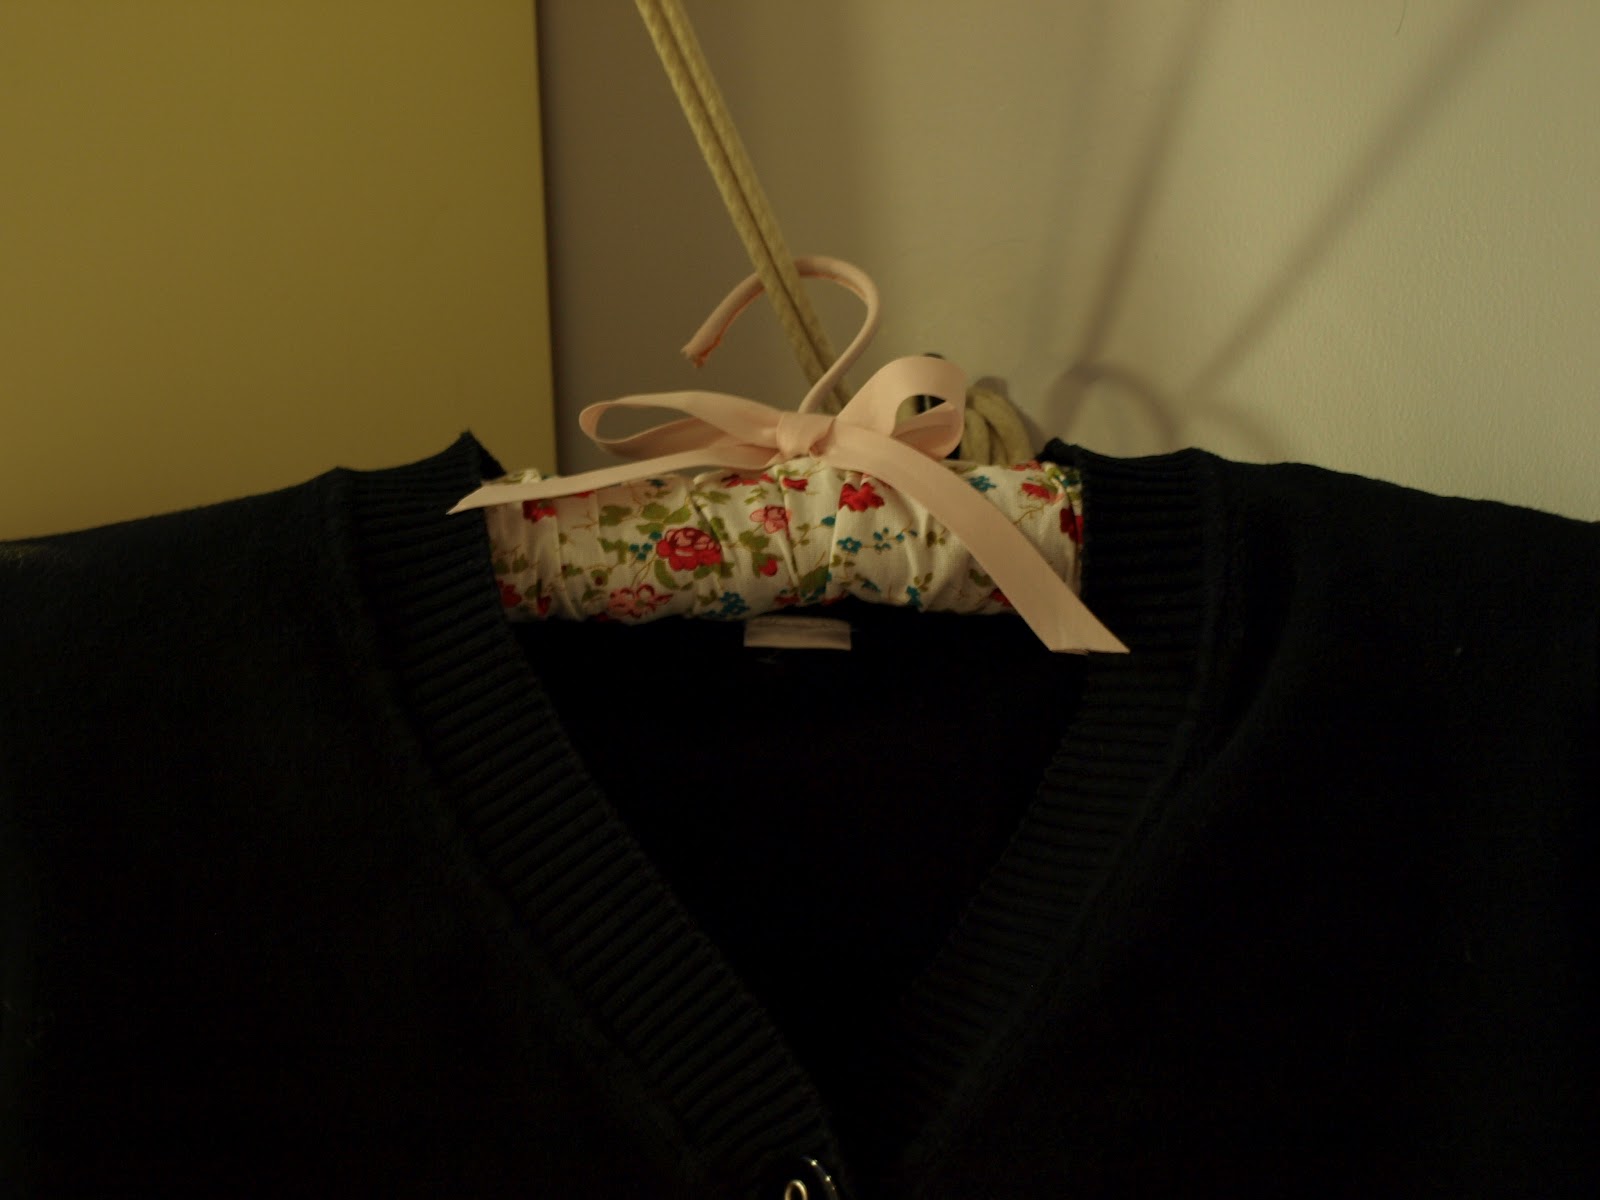
padded coat hanger for sweaters and delicate bits e.g.


Not bad for one day which also contained a good deed involving lots of cardboard boxes and, will soon include a session at aerobics.   So, that is Monday...

Friday, February 3, 2012

Steeking? A knitting term, so look away now if you must!

I am in the middle of a blanket, knitted in Shetland wool, designed by the very talented Kate Davies.  The amazing design composed of rams and ewes (or yowes as Kate tells us they are called by Shetlanders) is knitted in the round so that all rows are knit, and the pattern flows nicely.  With the aid of a steek - a narrow extra band of knitting that is not included in the main pattern - the fabric can be cut and laid flat for borders to be included.
central checkered area  =  steek

Steeking is a very useful technique for colour-patterned knitting because it means the knitter never needs to do pesky purling in the main pattern.  Garments are knitted as tubes and then cut to create armholes and necklines, or front openings for waistcoats, cardigans or jackets.  It is a part of the knitting traditions of many countries.   The most terrifying thing about it for first-time steekers is that you have to cut the beautiful piece of patterned fabric that you have spent ages creating.  Yes, CUT it, really, with scissors!

There seem to be a number of methods and lots of advice available in books and on the internet for those brave/mad enough to want to try it.   I know some people like to follow video tutorials on you tube, but my most useful sources have been Elizabeth Zimmerman's books and Eunny Chang's tutorial series.  


My first steeking experience was with a cardigan knitted in Norwegian wool to a design by Solveig Hisdal (Poetry in Stitches).  Once the fabric was cut I followed the instructions as given, which produced very neat little facings to cover the cut ends:


  It was a success, and gave me the courage to try out other methods and garments.


Next, a Fair Isle slipover from Folk Vests (Interweave Knits) by Cheryl Oberle , where once cut and machine-sewn the steeks just seem to stay firm even though visible.


I had thought about covering them with sewn-on binding or tape, but they don't appear to need it even after wearing.  This experience bears out Eunny's comments that some Shetlanders don't even bother reinforcing because the wool holds together without it.  Fine for real Shetland wool then, but don't try it with anything less.

Back to the blanket.  Kate's pattern tells us to use the crochet reinforcement method for this.  I tried it thus:

and promptly ripped the crochet out.  I am with EZ on this - knitting and crochet really don't mix!  Back to the machine sewing method:


and all's well again.  Now for the (long) border....